Halloween serie suit; Mommy

octobre 18, 2018 0 Comments

How to make an easy and cheap Mommy


    Are we ready for today lesson, right, right; right I see all of you here and full ready so for today since we already start the Halloween series, I decide that we will made a very easy Halloween DIY that very young kids can make also and most important it very cheap so let me see if we have everything
 Hmmm we have:  

 ♥ Milk bottle
 Simple shopping bag
 White glue
 Brush 
 Scissors  
 ♥ Knife

  We start now so we take this empty milk bottle after we clean and all with help of a knife we cute part in a way we will have 2 eyes and 1 mouth anyway as you want it to be free your imagination 

Now we cute our shopping bag to pieces 


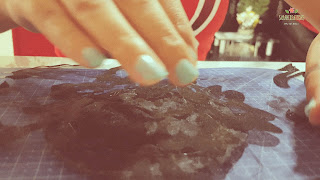
Time to glue the pieces of the shopping bag around the bottle 


Here we got our scary mummy you can add a candle inside to give scarier look ohhhh


So as we are used here our video 


The French version 


Oh here we are finish our scary mummy what do you think dear reader do you like have ideas questions suggestions share with me I will happy to read it all.

Have nice day to support me please follow me there


Serie Halloween suite : Une momie

octobre 18, 2018 0 Comments

Comment faire une momie avec des furniture qu'on peut trouver dans votre cuisine !


    Alors, alors mes chers êtes vous prêts pour la leçon d’aujourd’hui, voyons voir pour ce cours puisque on a commencé une série spéciale halloween ; on va faire une décoration très simple et surtout pas chère plutôt on va donner une nouvelle vie aune bouteille ne me regardez pas comme ca vous m’avez bien entendu alors voyons voir si on a tout hmmmm :


  Bouteille de lait  
 ♥ Un sac de course
  Pinceau 
  Ciseau 
  Couteau

    Alors on commence notre momie On prend cette bouteille de lait vide après l’avoir nettoyer , on coupe avec l’aide d’un couteau 3 trous de sort on aura 2 yeux et une bouche , ou comme vous voulez laisser libre A votre imagination


   Maintenant on coupe notre sac de course a des petites pièces

   La on colle autour de la bouteille jusqu'à en mettre sur tout 


   Et voila notre horrible momie, pour un look plus scary on mit une petite bougie on a un look plus scary 


 L’article version anglais

Et la vidéo comme toujours alors 


Nous  voila à la fin de l'article que pensez vous oh vous mes chers lecteurs que pensez vous ? vous aimez ? des idées suggestions questions laissez les la section des commentaires je serai très heureuse de les lire amusez vous biennnn


A very easy DIY to make a witch hat

octobre 04, 2018 0 Comments

A very easy witch hat


-Oh my oh my almost the important day and still I m not ready where is my broom oh it here my dress need my spell quick… quick finally I m ready will take my hat ad go meet my friends and celebrate the important day but wait …wait where is my hat oh no can’t find it no no no no I m damned sure can’t do it over for this year

-Oh dear witch don’t worry here I can help I have a simple and quick diy to make your hat just stay with me I will show you I have a video also if you want Well let start first we need:  


Red ribbon 2.5 cm  
Fabric 
Transparent fabric 
Headband - optional –  
Pen 
  Scissor  
Cardboard  
Glue Gun 


  Are you ready all your furniture it here so let began

  First we take our cardboard and we drawn circle

then  we cut 2 circles


Here our 2 discs

Then we take the fabric ,you still with me don’t you? well we take the fabric and put around the cardboard discs so we can get 2 fabrics discs


-Then what then what tell me
-  Okay okay don’t be like a child wait a bit I know that you like it

So I said after we made out disc we take one and make a cone with one of the discs

 Are you still with my dear witch for the other disc we gun the transparent disc on top of it


  Then we glue our cone on the other disc

Here we finish
-No no I want more decoration it to simple 
Oh it easy you put a red ribbon around the cone 

And now you can glue this beautiful flower


  So what you think about our hat you like it ?

Here the video 


The French version of this article 

Oh here we are finish our hat what do you think dear reader do you like have ideas questions suggestions share with me I will happy to read it all .

Have nice day to support me please follow me there
  Contact me: safaecreations@gmail.com 
  Blog:   https://safaecreationsblog.blogspot.com
  Facebook:   https://www.facebook.com/safaecreations  
Instagram : https://www.instagram.com/safaecreati...  
Pinterest : https://www.pinterest.com/safaecreati...  
Twitter : https://twitter.com/safae_taji
Youtube : https://www.youtube.com/channel/UCfoDCuiYwWX08P80OxNcPqA?sub_confirmation=1
DIY un chapeau de sorcière facilement

octobre 04, 2018 0 Comments

Un DIY pour faire un chapeau de sorcière facilement


     -Oh oOh je n’ai plus de temps ohlala j’en ai rien fais encore oh my oh my je suis en retard et le grand jour approche que dois je faire que dois je faire hmm oh voila ma liste la robe est la bien mon balai touts mes sorts sont aussi la bien …bien je suis presque prête et voila enfin mon chapeau mais mais… mais quel horreur quelle catastrophe mon chapeau est …est détruit comment je vais faire maintenant et je n’ai plus de temps pour avoir un autre mon dieu mon dieu je suis damné je ne pourrai pas aller mais quelle chance pourquoi ? pourquoi moi comment je vais faire?

    -Mais allons chère amie, moi comme toujours j’ai la solution je vais te faire chapeau de sorcière 

    -impossible on a pas le temps
   
    -juste crois moi et suis mon tutoriel d’accord aller tout d’abord on a besoin de:


          Ruban rouge 2.5 cm 
           Tissu  
         ♥ Tissu transparent
          bandeau ( optionnelle )  
         ♥ Papier carton 
            Stylo  
          ♥ Ciseaux  
         ♥ Pistolet à colle 

  Alors ma chère sorcière t’es perte t’as tout ramené allez, on commence


  Au début on dessine rond sur notre papier carton 


On les découpe 

voila on a 2 

Puis on les enveloppe avec le tissu pour avoir 2 disques.


-tu me suis toujours mon amie ?

-hmm oui oui ça a l’air facile dis donc

bien on continu on prend le premier disque et on le tourne de sort de faire une cône d’accord


 on colle alors sur l’autre disque notre tissu transparent


la on colle la cône sur le disc et voila notre chapeau 


-ah non non c’est trop simple il n’y a ni décoration ni rien 

-mais c’est facile on ajoute ce ruban rouge 

puis cette belle fleure rouge sinon tu peux faire tout ce que tu veux 


  Voila la vidéo 


la version anglaise de l'article 


alors le voila que penses tu oh j’adore j’adore j’adore j’ai le meilleur chapeau moi et vous mes chers lecteurs que pensez vous ? vous aimez ? des idées suggestions questions laissez les la section des commentaires je serai très heureuse de les lire 

amusez vous biennnn 

pour me supporter svp suivez moi ; 
  Contact me: safaecreations@gmail.com 
  Blog:   https://safaecreationsblog.blogspot.com
  Facebook:   https://www.facebook.com/safaecreations  
Instagram : https://www.instagram.com/safaecreati...  
Pinterest : https://www.pinterest.com/safaecreati...  
Twitter : https://twitter.com/safae_taji
Youtube : https://www.youtube.com/channel/UCfoDCuiYwWX08P80OxNcPqA?sub_confirmation=1

Follow Us @soratemplates